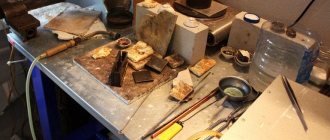
Copper products are actively used not only in various industries, but also in everyday life. In this regard, it is quite natural that many craftsmen have a question about how to melt copper and make various products from it at home using the casting method. Knowledge of this technology, which has been known to mankind since ancient times, allows us to create various objects not only from copper, but also from its alloys - brass and bronze.
Melting copper in a homemade stove
Melting metal at home
For a long time, men began to think about how to create their own furnace for melting metal at home. It must be portable and meet all conditions. The production facility has furnaces for melting large quantities of metal. At home, you can assemble a furnace for melting up to five kilograms of aluminum. Let's look at how to make a smelter at home.
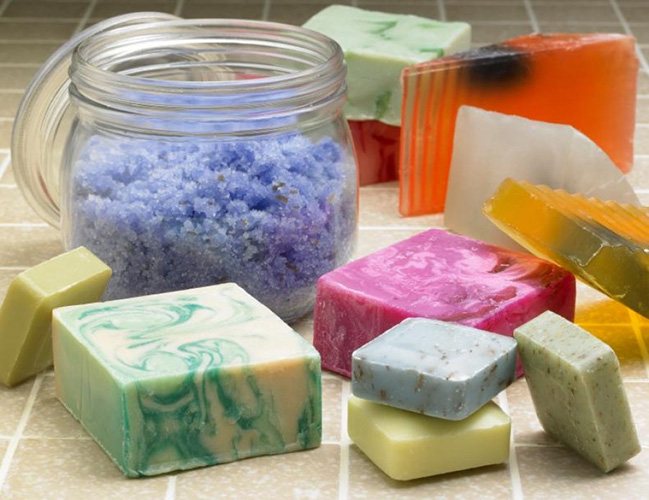
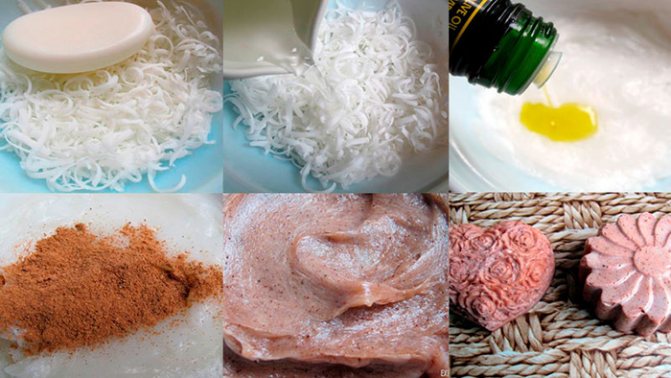
How to prepare soap for melting
It will be possible to melt soap at home correctly only after preliminary preparation of the material. If you take the product in one piece, it will take a long time and be difficult to melt. In this case, it will be difficult to make the mass homogeneous.
To make your task easier, you should grind the soap. For this reason, the remaining small soap pieces should not be thrown away. You can put them in a separate container, and then melt them and use them as a whole beautiful neat block. This is a good saving. For example, in a year it is possible to accumulate enough remnants for several full-fledged new bars.
You can just cut the soap with a knife. But it is much more convenient and faster to use a grater to grind it. The latter should also be separate, not intended for food products. For example, old and no longer suitable for food. The result will be neat chips with particles of the same size.
It is difficult to use a grater with small divisions, so it is best to choose one with medium or large ones. You can also choose a food processor. The device will need to select a suitable attachment with knives. But in the future they will need to be washed and processed with special care to remove soap residues.
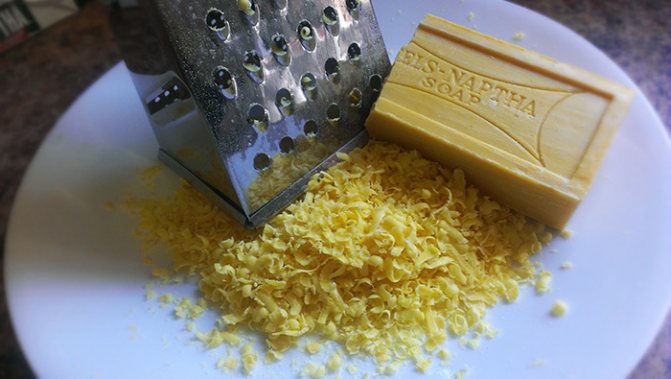
To melt the soap quickly, it is advisable to grate it
It happens that the soap turns out to be old and overdried. This material is very brittle and difficult to rub. In this case, it is recommended to also use olive oil. Vegetable fat is added to soap at the rate of 25-30 ml per 1 kg of solid material. It is not recommended to increase the amount of oil in an attempt to make the consistency of the product softer. Otherwise it will turn out too greasy.
There are other options for softening soap. For example, various liquids. It could be milk, cream, herbal infusion. All of them will make the finished product even more useful and improve its structure.

Approximately 1 tbsp of the selected liquid is taken. l. for ½ kg of soap. All of it should be absorbed into the mass. To do this, you will need to leave the chips with additives for a couple of hours. Afterwards you can start melting the soap. The herbal infusion can be prepared taking into account your own skin type and existing problems. For example, softening or healing.
It is advisable to prepare for the process not only the main component, but also all the other necessary ones. For example, tools, accessories, additives. Usually the process is carried out in the kitchen.
Here you will need to put all food products, dishes and cutlery used for eating in closed containers and cabinets. All this should not be exposed to soap shavings or drops (even the smallest ones) of the already melted mass.
It is worth leaving nearby only those containers and accessories that will be needed for melting soap and are not intended for food. They will then have to be stored separately.
If there are small children in the house, you will need to organize the process in such a way that they do not interfere and do not get burned by the hot mass. The same applies to pets. It is important to ensure that their hair does not get into the soap mass. Before starting work, you will need to open a window or window so that the room is properly ventilated.
Equipment and materials you will need
In order to melt metal, you need to buy the following components for manufacturing:
- fire brick;
- nails;
- transformer;
- copper wire;
- graphite;
- mica;
- asbestos and cement tiles;
- gas-burner;
- crucible.
The dimensions will vary depending on the wishes of the person collecting it. It is better to create a small furnace for melting metals if you want to use it only for your needs. You will spend less time making it, and a small amount of kilowatts will be spent heating it. If you do it using diesel fuel or coal, then do not forget about installing thermal insulation and air supply.
Metals such as iron, nickel, tin, and copper are melted in an electric furnace. The output voltage in an electric furnace should be greater, which means the distance between the electrodes will increase. Brushes from an electric motor are suitable instead of electrodes.
Step-by-step instruction
How to make a melting furnace at home - read the following instructions:
- A high-frequency alternating current generator is installed.
- Spiral winding. Made from copper wire.
- Crucible.
All these elements are placed in one housing. The melting cup is placed in the inductor. The winding is connected to the power source. When the current is turned on, an electromagnetic field appears. The resulting eddy currents pass through the metal in the cup and heat it. Melting occurs.
Homemade muffle furnace
The positive properties of an induction furnace are that when melting metals, a homogeneous melt is obtained, alloying components do not evaporate, and melting occurs quite quickly. In addition, the installation of such a stove does not harm the ecosystem and is safe for the user.
Cooling can be done using a fan. Only the latter should be located as far as possible from the furnace, otherwise its winding will serve as an additional closure of the vortex flows. This will reduce the melting quality.
Wheel furnace
How to melt in a water bath
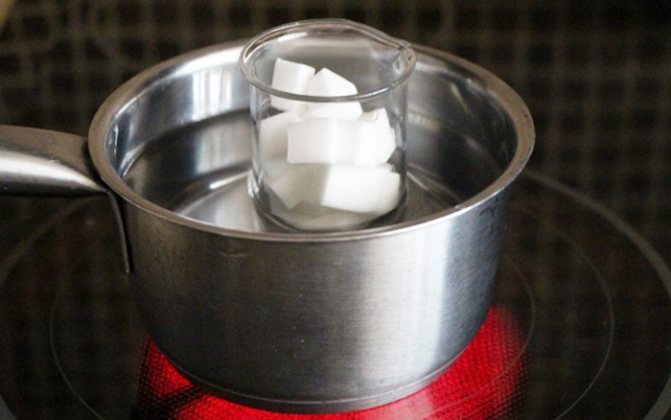
The easiest way to melt soap at home is in a water bath. This is a great way that allows you to organize the entire process in a regular kitchen without special equipment.
A gas or electric stove and 2 suitable pans of different sizes are enough. One container of soap will need to be placed in another with water. It is convenient to use small pans or bowls (for example, metal).
To melt the product using the method discussed, you must:
- Fill a large saucepan with water (it doesn’t matter - hot or cold, boiled or from the tap). The container should be approximately 1/3 filled with liquid. Let there be enough water so that it does not boil away or splash during the process. You will need to ensure that the liquid does not fall into the smaller container, even with active bubbling.
- Place a smaller container on top of a large pot of water - a saucepan or bowl.
- Pour soap shavings prepared in advance into a smaller bowl. It should not fill the container more than halfway. Otherwise, it will be inconvenient to interfere with the chips during the melting process. In this case, additional additives may not fit into the mass.
- Send the entire resulting structure to the stove and turn on the heat. It needs to be heated over low heat.
- Be sure to periodically stir the mixture with your chosen accessory – a spoon/spatula.
- If you decide to use additional ingredients, they should be added after the soap has melted. At this stage, it will turn into a translucent mass with a jelly-like consistency.
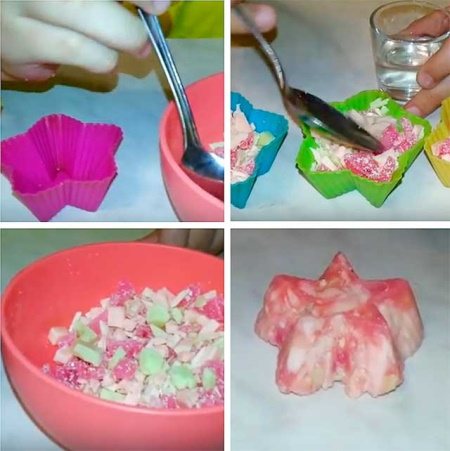
When oils, dyes and other additives have already been poured into the mixture, it is important to mix everything again. Additional ingredients should be distributed over the base as evenly as possible. The melted mass is poured into molds.
At this stage it should be viscous and not too runny. Be sure to tap the containers with the soap mixture on the table to remove internal bubbles and compact the mixture. All that remains is to treat the future solid soap with alcohol on top to make the surface as even and smooth as possible. In this form, the mass is left in molds to harden.
Features of melting some metals
In order to melt metal at home, this element must be placed in a small cup or crucible. The cup with the material is inserted into the oven. Then its melting begins. To melt the precious elements, they are placed in a glass ampoule. In order to make an alloy from several components, follow these instructions:
- First, a refractory element - copper or iron - is placed in the melting cup.
- Then a more fusible component is placed - tin, aluminum.
Melting aluminum in a homemade furnace
Steel is a refractory material. Its melting point is one thousand four hundred degrees Celsius. Therefore, to melt steel at home, you must follow the following instructions:
- To melt steel at home, introduce additional regenerators. If the furnace runs on electricity, then electricity is used.
- During induction heating, slags are added. They increase the speed of melting.
- Constantly monitor instrument readings. If necessary, lower the melting temperature by switching to a more moderate mode.
- It is always correct to determine whether the steel is ready for work or melting. Follow all the above steps. Only then will the resulting metal be of high quality.
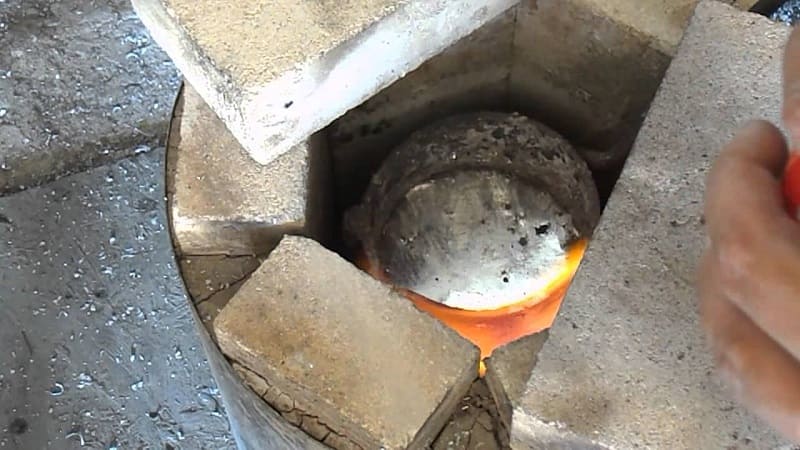
To melt iron at home, the furnace must be preheated. First, a large piece is placed, and then small ones. Iron must be turned over in time. A properly molten metal will have a spherical shape.
If you are going to make bronze, you must first place copper in the melting hole. Since this component is more refractory. When the copper is melted, tin is added.
Under no circumstances should elements such as cadmium, lead or zinc be melted. When burned, they produce toxic yellowish smoke.
And when melting aluminum, tin or iron, you must be careful. Rivet slowly and should be done with a small hammer. Heat the material frequently until reddened and cool in cold water. Only then will you get the perfect alloy at the end.
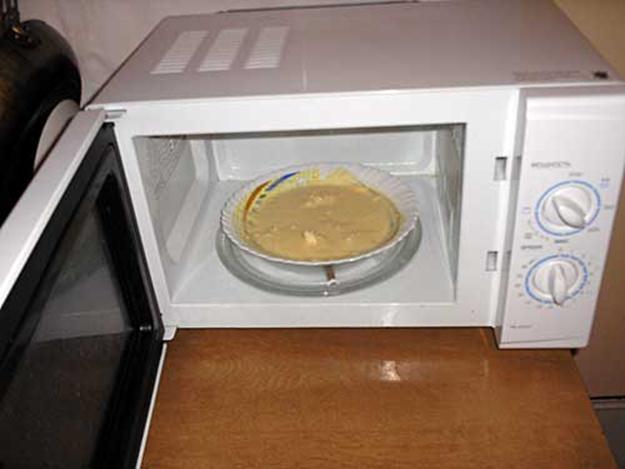
In the microwave
You can melt soap at home even faster and easier. To do this you will need to use a microwave oven. You cannot place a pan in it, so you need to take another suitable dish. It should have a mark on it that it is acceptable to use in the microwave.
To melt pre-prepared chips, you must:
- Place the grated base in a suitable plastic or glass container. It is best to take a small container and not fill it completely. It is allowed to melt the soap in portions in several approaches.
- Place the container with the chips in the microwave and turn on for 3-3.5 minutes. at average power.
- After the specified time has passed, remove the dish with the soap mass out and mix its contents with a plastic spoon/spatula.
- Return the dish with almost completely melted chips back to the microwave and turn on the device again for the same time.
- Repeat the procedure described in the steps above until the mixture is completely melted. It should become liquid and as homogeneous as possible. Thorough mixing is required each time.
- Add butter and other selected additives to the melted mass.
All that remains is to pour the base with additional components into the prepared forms. If they are plastic, then it is best to pre-coat the containers with a small amount of any vegetable oil. In such forms, the soap mass will stand until it cools completely.
Melted soap can be used to make more than just new bars. Also, based on the resulting mass, it will be possible to make bath foam, shower gel, liquid soap, and various aromatic detergents. In terms of their properties, they will be no worse than store-bought ones, but at the same time they are much cheaper.
Melting copper at home: smelting temperature and methods
Copper is a ductile material that is not subject to oxidation. Small parts are made from it and used in repair work. You can melt the scrap yourself in a garage, outbuilding or in your own kitchen. Experts will tell you how to melt copper in artisanal conditions. The technology is simple; the main thing is to take into account the physical properties of copper and alloys when melting.
Main characteristics and melting point of copper
Copper was used in ancient times and was melted earlier than other metals. The metal is valued for its chemical neutrality, durability, and electromagnetic properties. The thermal conductivity of copper alloys is slightly lower than that of silver.
Home copper smelting is essentially no different from industrial casting. You can melt down pieces of used radio components, inexpensive jewelry, and cutlery items made of cupronickel. Copper smelting in its pure form occurs at +1083°C; it is not difficult to create such a regime in domestic conditions. The alloy with zinc and tin does not need to be melted to the melting temperature of copper; up to +900 – 950°C is sufficient. When selecting scrap pieces, it is important to know that pure alloys are used for electrical parts. Bronze and brass may contain harmful chemical components; they will begin to release from the metal when melted. The metal boils at a relatively low temperature, +2560°C, and the alloy begins to bubble.
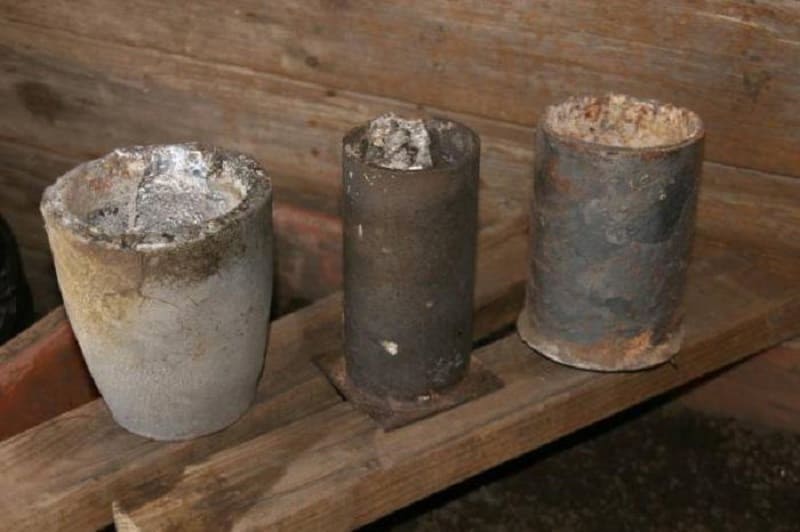
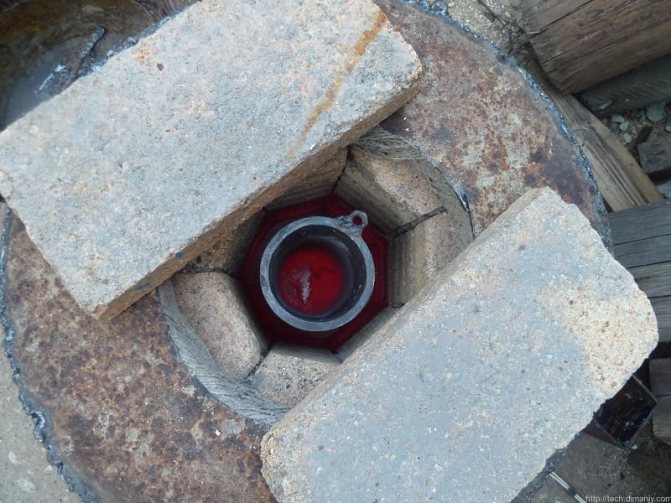
Melting copper at home: step-by-step instructions
A tin can and a fire are not suitable for melting. Other heat sources are needed, for example, homemade stoves or ready-made burners with a high flame temperature. For melting, choose heat-resistant vessels; it is best to use a ready-made crucible made of refractory raw materials that can withstand temperatures up to +300°C. For casting, a mold or mold is used. When working with a crucible, use special tongs with long handles; they should grip the crucible well.
Now a little step-by-step instructions on how to melt copper scrap at home:
- Preparation of scrap, small pieces of metal are used as raw materials.
- Preparing the hearth where the crucible will be installed. To melt scrap, ready-made or improvised furnaces and burners are used.
- The scrap is poured into a crucible to melt the metal. Experts advise preheating the crucible so that the metal is heated more evenly.
- The preparation of the mold or mold is the place where the metal will be poured after melting. For manufacturing, a material is used that has a melting temperature higher than that of copper.
- Before pouring, remove scale from the hot metal using a long spoon. Oxides should not get into the casting.
- The melt is carefully poured into the prepared mold. You need to work carefully, the drops will leave poorly healing burns.
A refractory flat sheet is used for the stand; a crucible or a special melting box is placed on it.
Muffle furnace
A laboratory muffle is the most convenient device for melting metal.
Some tips on how to melt a copper alloy in the laboratory:
- the muffle furnace has a temperature regulator knob, it must be set to a mark slightly higher than the melting temperature of the alloy;
- The graphite or ceramic crucible is heated well before loading the charge;
- After casting, scale is removed from the hot crucible using a wire hook.
The casting in the muffle is heated evenly, the melter is isolated from volatile harmful components. Through the fireproof glass of the door it is convenient to observe the progress of copper melting.
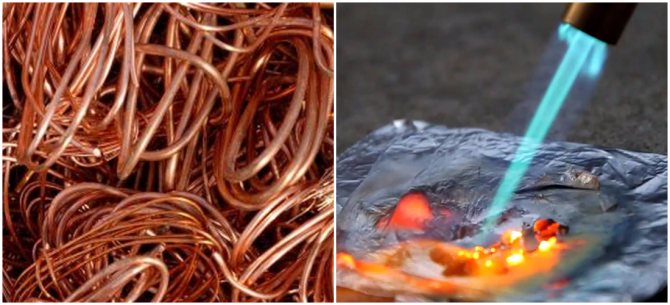
Gas-burner
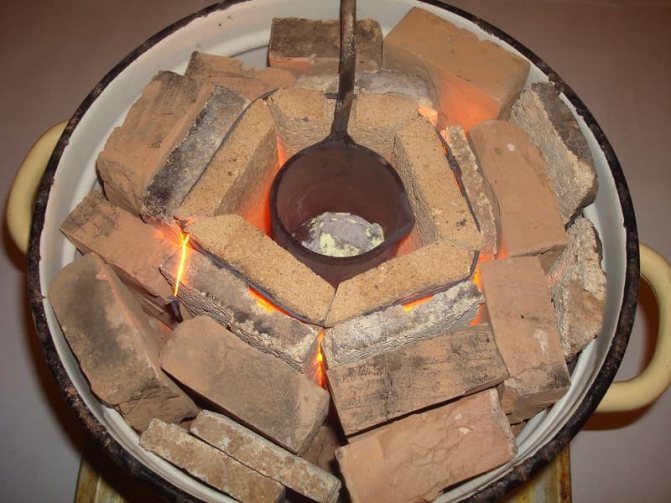
Copper smelting in small volumes is carried out with a manual gas torch. The power of a portable device does not matter much. The burner is placed under the crucible in which copper scrap will be melted, the flame is directed to the bottom, the tongues should cover it completely. The process is labor-intensive and lengthy. To protect against oxygen, colored scrap is sprinkled with coal chips.
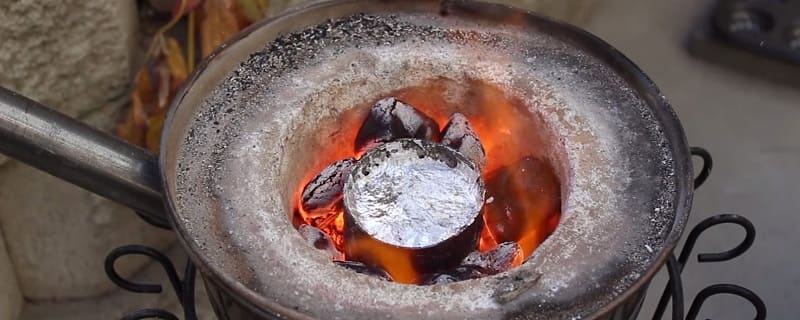
Copper is smelted at home using a crucible furnace or forge. It is a limited space where the crucible is placed on a stand. The coals are lit from below or a burner is brought in. It is necessary to organize air supply to increase the combustion temperature of the fuel. To speed up the melting process, cover the top of the forge with a tight lid. Well-hot charcoal is heated and poured into a crucible with a crowbar. The method is used by specialists who often do small-scale casting.
Blowtorch
An alloy with zinc and tin melts at a low temperature. A conventional blowtorch is used as an energy source for melting; it is placed vertically under the crucible so that the flame covers the surface of the bottom and the lower part of the side wall. To reduce the volume of scale, the scrap is sprinkled with charcoal. The oxidation process during melting under a layer of coal chips will not proceed as intensely.
How to melt copper and its alloys at home
Many owners face the problem of how to melt copper at home. Some people want to cast copper products, others have accumulated copper scrap, which takes up a lot of space, and it is a pity to throw it away. Those who believe that this is a complex process and that it will not be possible to melt copper at home can be reassured. Ancient people knew how to do this several centuries BC, without having any special devices for this.
The melting point of pure copper is 1083 °C.
Among metals that are widely used in industry, this is an average value. Tin, lead, magnesium, zinc, and aluminum have a significantly lower melting point; for silver and gold it is 960 °C and 1063 °C, respectively. Iron has a melting point of 1539 °C. Therefore, copper, silver and gold can be melted in iron vessels. The addition of tin, lead and zinc can significantly reduce the melting point of copper, but this produces not pure copper, but its alloys - bronze and brass.
Before melting begins, you need to prepare:
- steel tongs,
- hook for collecting oxide film from the surface of the melt,
- form for filling.
The hook can be made from steel wire. The form can be any steel container; you can prepare a depression in the ground, as our ancestors did. For artistic casting you will need a special mold.
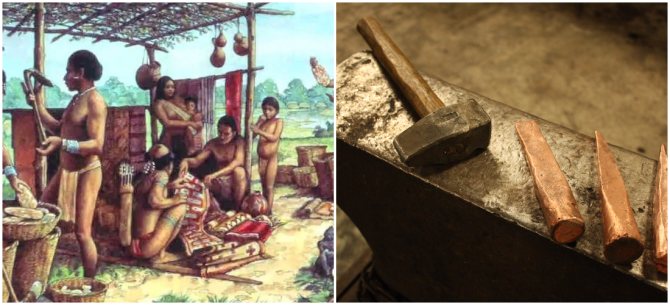
Characteristics of copper
Copper is one of the first metals that man learned to mine and process. Products made of copper and its alloys were used as early as the 3rd century BC, as evidenced by historical data and the results of archaeological excavations. The widespread use of copper has largely been facilitated by the fact that it can be quite easily processed by various mechanical methods. In addition, it can be easily melted.
Copper, the surface of which has a distinct yellowish-red color, due to its softness, can easily be processed by plastic deformation. When the surface of copper interacts with the surrounding air, it becomes covered with an oxide film, which gives it such a beautiful color.
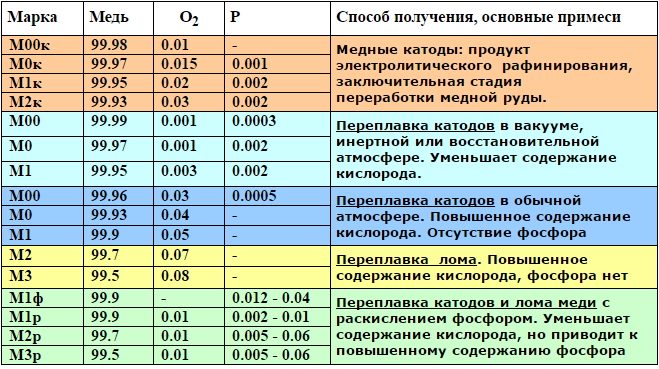
Grades of technical copper and their chemical composition
The characteristics of copper, such as electrical and thermal conductivity, are also of great importance, for which it ranks second among all metals, second only to silver. Due to these properties, products made from it are actively used in the electrical industry, as well as in cases where it is necessary to ensure rapid heat removal from a heated object.
Another important parameter of copper, which directly affects the amount of energy and labor consumed in the production of products from it, is the melting point. For pure copper, the temperature at which the metal changes from solid to liquid is 1083°. If you mix copper with tin and get bronze, then the melting point of such an alloy will already be 930–1140°, depending on the content of the main alloying additive in it. A copper alloy such as brass, which is obtained by adding zinc to the base metal, has an even lower melting point, which is in the range of 900–1050°.
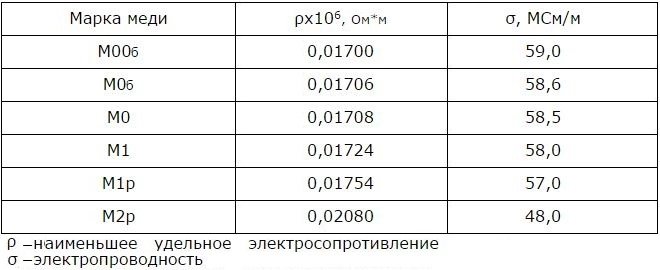
Electrical properties of copper at a temperature of 20°
If you decide to implement a technological process such as copper casting at home, it is important to know one more parameter - its boiling point. At 2560°, copper begins to literally boil, which is clearly visible in the video of this process. The appearance of bubbles on the surface of the liquid metal and active gas formation in it is facilitated by carbon released from copper as a result of its oxidation, which occurs during strong heating.
If you bring the ground to a boil, then the castings made from it will be of low quality; their structure and surface will be characterized by a large number of pores, which reduce not only its decorative, but also its mechanical characteristics.
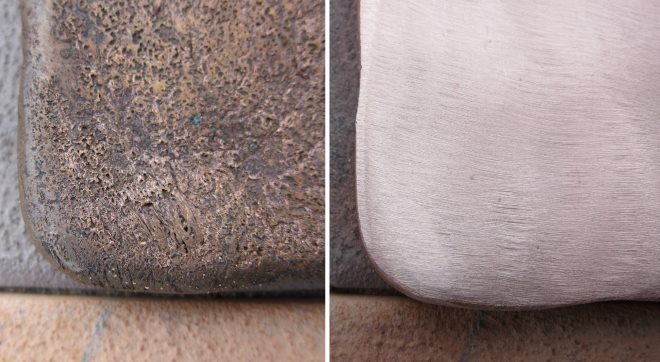
If the smelting technology is followed, shallow pores may remain on the surface of the copper ingot, which can be easily removed by grinding
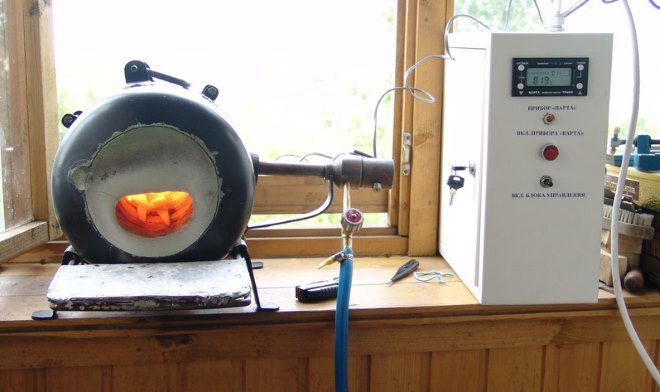
Melting in a muffle furnace
- Household muffle furnaces can be purchased in specialized stores. Modern ovens are equipped with temperature regulators and an inspection window, and can be vertically or horizontally loaded. An average quality oven can maintain temperatures up to 2000°C, while a professional oven can maintain temperatures up to 3000°C. It can melt not only copper, but also iron. But it should be taken into account that at a temperature of 2560 °C the copper melt begins to boil. After cooling, the ingot will have a porous surface, which promotes rapid oxidation and destruction. Such an ingot has an unpresentable appearance; it lacks the characteristic copper luster.
- Regardless of the smelting method, copper scrap must be crushed. This will shorten the process time and guarantee that the melt will be homogeneous.
- Crushed copper scrap is poured into a crucible, the crucible is placed in a muffle furnace preheated above 1083 °C.
- After making sure that the copper has melted, the crucible is removed from the furnace with tongs and the oxide film that always forms on the surface of the melt is removed with a hook. After this, the melt should be immediately poured into the mold.
It is not worth purchasing an expensive muffle furnace just for one melt. Copper can be melted in other ways.
Tools, containers and accessories
First of all, the main ingredient is taken for the process - a whole bar of soap, which requires remelting or soaping. It is advisable to take the latter in large quantities so that there is enough material for comfortable work. For example, accumulate remnants over a long period of time.
In addition to the main component, it is worth taking additional additives to make the soap healthier.
A detailed table will help you understand them:
| Additives to soap during remelting | What are they for? |
| Essential oils | For a pleasant aroma and healing effect. Great for any soap, such as citrus oils. |
| Base oils | They make soap healthier for the skin. You can take both olive and almond, walnut, and grape seed. Sea buckthorn oil makes soap especially useful. It also slightly colors the finished piece. |
| Alcohol solution | It should be poured into a spray bottle. This solution is needed to remove air bubbles from the surface of the melted mass and obtain a perfectly smooth, beautiful piece of soap. |
| Dyes | For coloring finished soap. It is best to use safe food colorings. For example, you can buy them in specialized confectionery stores. |
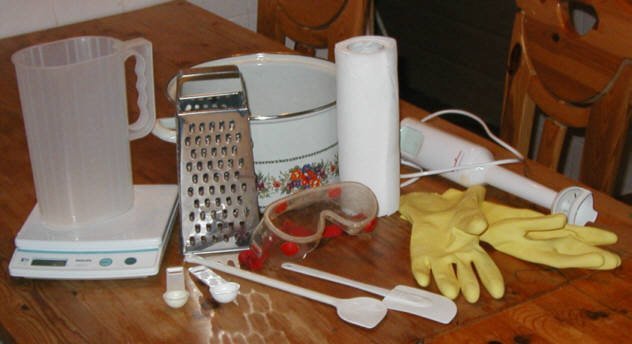
In addition to special additives, you need to prepare the following tools/utensils/devices:
- a grater, which is needed for grinding soap (it is best to take it in the shape of a cone);
- a melting container of a suitable size and made of a safe material (for example, glass or ceramic);
- molds for pouring soap mass and hardening it (if it is not possible to buy special professional ones, children’s ones for the sandbox or silicone ones for baking are also suitable);
- accessories for mixing the mass.
Instead of special forms, it is allowed to take even any shallow containers for food. For example, boxes of processed cheese and sauces. It is best to use them in different sizes.
It is most convenient to mix the mass with a wide spoon or spatula. It is recommended to choose them from durable, high-quality plastic. These accessories may also be ceramic.
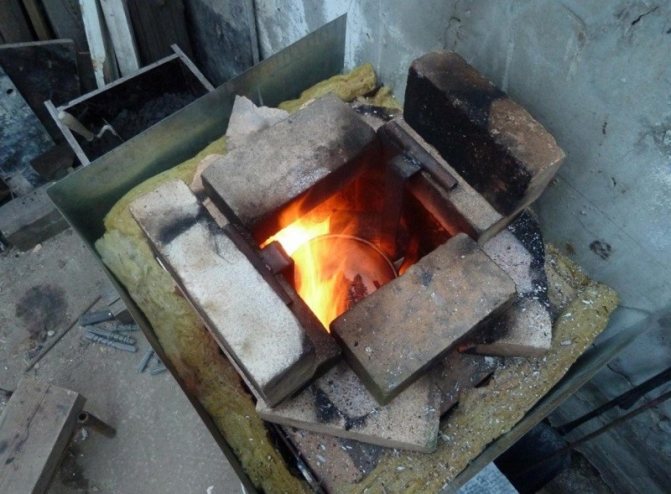
Melting using homemade devices
Some car enthusiasts have homemade forges in their garages that can be used to melt metals. If you couldn’t find a forge, you can make it yourself.
- Supports are installed on the ground, for example, sand-lime bricks, and a steel mesh with small cells is placed on them.
- A layer of charcoal is poured onto the mesh and set on fire. To get a high temperature, you need to increase the air flow. The easiest way to do this is with a blow-out vacuum cleaner , directing a stream of air to the place where the coal is burning.
- All that remains is to place the crucible on the burning coals and wait for the copper to melt. The melt comes into contact with atmospheric oxygen, so an oxide film is actively formed, which must be constantly removed. You can sprinkle the surface of the melt with small coals or ash from them. Slag is formed, which is then easily separated.
Melting temperature
Melting is a process that characterizes the gradual transition of a metal from a standard solid state to a liquid consistency. Each metal compound or metal in its pure form has its own temperature, under the influence of which it begins to melt.
An important factor in this case is what impurities are included in the composition of the melted compound.
So, copper begins to melt at a temperature of 1083 degrees Celsius. If you add tin to it, the melting point will decrease and be approximately 930-1140 degrees Celsius.
In this case, such a fluctuation is due to the amount of tin included in the alloy. The compound of copper and zinc melts at an even lower temperature - 900-1050 degrees. Heating of any metal is associated with the gradual destruction of the lattice formed from many crystals.
With heating, the melting temperature rises to the maximum required level, then its growth stops and remains at the achieved level until all the metal has melted, after which it begins to decrease.
Copper, heated to the highest possible temperature, boils at a temperature reaching 2560 degrees. In appearance, its boiling is similar to the boiling of any liquid substances, on the surface of which, as they heat up, bubbles appear and gas is released. Thus, during the boiling process, copper releases carbon formed as a result of oxidation and its close contact with air.
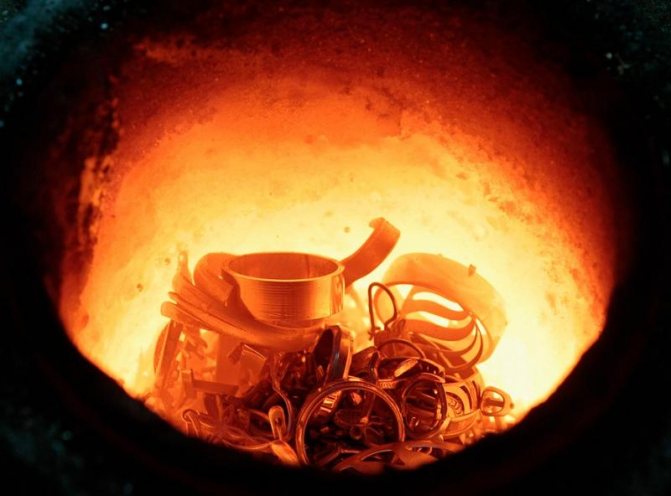
Melting copper
The technology of copper smelting has been widely used since ancient times, when people used fires to melt metal to make arrows, tips and other weapons and household items.
Melting copper at home is also possible. For this you will need:
- The crucible where the copper will be melted, and the tongs needed to remove the crucible from the furnace or remove it from the heat.
- Charcoal.
- Muffle furnace (it is better if the heating temperature is controlled in it).
- Horn.
- An ordinary vacuum cleaner.
- A form into which molten liquid is poured.
- Hook made of steel wire.
- Gas burner if there is no muffle furnace.
The melting algorithm includes several step-by-step steps:
- Grind the metal and pour it into a crucible . Moreover, the smaller the fragments, the sooner it will reach a molten state. Place the crucible in a furnace heated to the highest possible temperature required to begin the melting process (here, by the way, you will need a temperature regulator). Many muffle furnaces have a window cut into the door. Through it you can safely monitor the process.
- must be removed from the furnace as carefully as possible using tongs . A film will form on the surface of the liquid substance; move it to the edge of the crucible using a wire hook. Pour the film-cleaned metal into a pre-prepared mold as quickly as possible.
- If there is no muffle furnace, copper can be smelted using a conventional gas burner . But then the copper will be in close contact with air, and the oxidation process itself will take place much faster. Therefore, to prevent the formation of a thick film on the surface of the metal, copper, when it reaches a liquid state, is sprinkled with crushed charcoal.
- You can also melt copper and its alloys using a forge . To do this, you need to heat the charcoal well and place a crucible with metal on it (pre-grind the copper). To speed up the heating process, point a vacuum cleaner turned on in the blowing mode on the coal. Particular attention should be paid to the tip of the pipe. It must be metal, since plastic will melt under high temperature.
Then it is worth using alloys. For example, brass, the shade of which is lighter than the others. This suggests that lower temperatures are needed to melt it.
How to melt cheese correctly: general recommendations
Regardless of how you melt your cheese, these tips will tell you how to melt cheese correctly and deliciously:
- Choose hard cheeses. They have a lower melting point and are more often used in sauces and main dishes.
- Avoid soft cheeses. Low-fat, low-moisture cheeses such as Parmesan and Romano burn easily and do not turn into a mushy consistency. Extremely soft cheeses such as feta and ricotta will never melt and should be avoided when making processed cheese.
- Grate, shred or slice the cheese before melting. It melts faster if cut into smaller portions. There is not much difference between grating, chopping or slicing. You can use the option that is more convenient for you.
- Let the shredded cheese sit for a while until it comes to room temperature, as cold cheese can cause it to melt slowly or unevenly. To reach room temperature, the cheese needs to sit for about 20-30 minutes. But do not leave the cheese unattended for 2 hours or more.
How to prevent cheese from separating
The separation of cheese can lead to the loss of not only the structure of the dish, but also the acquisition of a not very pleasant taste. To prevent this from happening, you can add the following ingredients before melting the cheese:
- Lemon juice;
- Flour;
- Dry white wine;
- Wine (white) vinegar;
- Corn or potato starch.
The pharmaceutical preparation sodium citrate also prevents the cheese from stratifying. It can be added to cheese when preparing sauces or cheese spreads.
How to make cheese sticky
For some dishes, it is very important to maintain the chewiness of the cheese. To do this, maintain an average temperature of 60 degrees during cooking. If the heat is higher than necessary, the ingredient will turn out too liquid, and if the temperature is too low, the cheese mass will turn out solid.
The consistency of the product is also ensured by constant stirring during cooking. It is also important not to overcook the cheese on the stove, otherwise it will become heterogeneous and lose its viscous properties.

In a frying pan
Melted cheese in a frying pan is suitable for most dishes, so do not neglect this method. To get the perfect result, follow the steps:
- Grind the cooled cheese using a grater;
- Leave it in the bowl for a while until it reaches room temperature;
- Transfer the grated ingredient into a non-stick container;
- Turn the heat to the lowest setting to avoid losing the moisture and fat in the cheese;
- Stir the cheese constantly and do not leave it unattended on the stove. It can burn or stick to the bottom of the pan at any time.
- Do not keep the product on the stove for too long, so as not to break the elasticity of the consistency and lose the taste. Remove from heat once melted.
In the microwave
This method is extremely risky because in a microwave oven it is often impossible to ensure that the processed cheese acquires the correct texture, and it can harden. However, if you still decide to microwave cheese, follow the recommendations:
- Place the cheese in a non-stick or ceramic bowl and place it in the microwave.
- Before putting the cheese in the microwave, add a little cornstarch to it. This will help the cheese melt as it cooks.
- Add an acidic ingredient: white wine, beer or wine vinegar. This will add flavor to the dish and help the cheese stay smooth while it melts.
- Melt the cheese on high for 30 seconds.
- Remove the bowl and mix the cheese thoroughly. It should be smooth and without lumps. If the cheese has not melted to the desired consistency, place it in the microwave for another 5-10 seconds.

For a couple
You can also melt the cheese in a water bath on the stove, in a double boiler or in a multicooker with the “Steam” function.
For a water bath, follow these guidelines:
- Grind the chilled cheese.
- Place the shredded cheese in a small, high-heat bowl.
- Take a pan, fill it with water to one third of the volume and place it on the stove or in the bowl of a double boiler or multicooker . Bring to a boil.
- As soon as the water boils, reduce the flame or temperature to low.
- Place the steamer or slow cooker basket in a saucepan directly over the simmering water and place the bowl of cheese on top of it.
- Let the water boil for another 1-5 minutes. Check the degree of melting of the cheese to ensure it reaches the desired consistency.
There are 2 more important points that should be considered for ideal cheese melting in a water bath:
- Before transferring the cheese, make sure the bowl fits into the steamer basket;
- Try adding a couple tablespoons of flour to the cheese if you want it to have a very smooth, sauce-like texture.
In the oven
For many oven-baked dishes, cheese is the icing on the cake. It is thoroughly grated and placed on top of a dish: sandwiches, casserole, roll, pizza, etc.
Which cheese melts best in the oven? The main secret of success lies not in the type of cheese, but in not overcooking the food in the oven. Otherwise, the delicious and crispy cheese crust will be too hard.

For soup
Most cheese soup recipes require grating the ingredient on a coarse grater and melting it in the broth using high heat until it becomes a smooth, stretchy mass.
Keep in mind that cheap products will not change their shape even when exposed to temperature.
2 ways to use processed cheese for soup:
- Grate, pour into a microwave-safe container and place in the microwave at maximum power for a minute. It is necessary to ensure that the product is softened and not fried. It should not develop a crust. As soon as the contents of the plate acquire the desired consistency, you should add it to the soup: evenly distributing it over the pan and stirring quickly.
- Grate it on a fine grater, and then grind it through a strainer. Add a ladle of hot soup to the resulting mixture and stir quickly. When the product has the consistency of thick sour cream, pour the contents into a saucepan on the stove and mix thoroughly.
To finely grate the cheese for soup, you can freeze it before cooking. When cooled, it holds its shape better and does not stick to the surface of the grater.
Thus, processed cheese for hot dishes is one of the most common ingredients in European cuisine. Its preparation depends on three components: variety, quality and recipe. It can be used in main dishes, appetizers and even desserts. As a rule, the product is served in addition to other dishes, although it can also act as an independent dish.